 Save
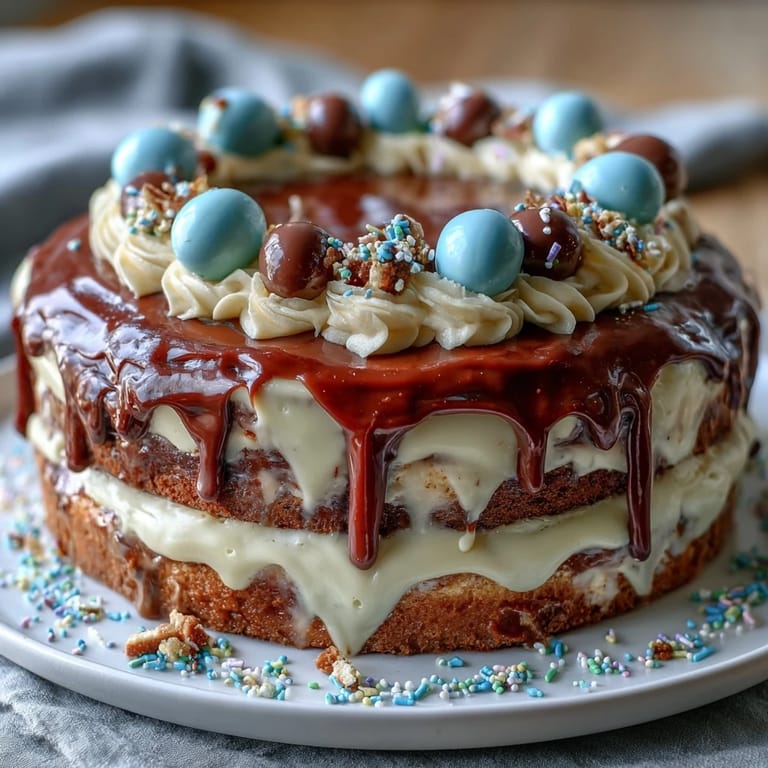
Save My sister called me three weeks before her graduation with a specific request: she wanted a two-tier cake with balloon toppers, something that felt celebratory but not over-the-top. I'd never made a tiered cake before, but watching her describe what she envisioned—layers of soft vanilla sponge, creamy frosting, those cheerful balloons floating on top—I knew this was the moment to figure it out. There's something about baking for someone's milestone that makes you want to get every detail right.
I remember standing in my kitchen at 6 AM on graduation day, the 8-inch pans already cooling on racks while the smaller 6-inch ones were still in the oven. My nephew wandered in half-asleep, drawn by the vanilla smell, and I let him sneak a warm cake crumb. He asked if the cake was going to be pretty, and I promised him the balloon toppers would make it special. His belief that it would turn out well somehow made my hands steadier as I began frosting.
Ingredients
- All-purpose flour: The foundation of both tiers—make sure it's spooned and leveled when measuring, not scooped straight from the bag, or you'll end up with a denser cake than you want.
- Baking powder: This is your lift, so check that container and replace it if you've had it longer than six months; stale leavening agents betray you quietly.
- Salt: A pinch enhances the vanilla without making anything taste salty, which I learned the hard way when I skipped it once.
- Granulated sugar: Beaten with butter at room temperature, it's what creates that fluffy crumb that makes people say the cake melts in their mouth.
- Unsalted butter, room temperature: Cold butter won't cream properly, so take it out of the fridge 30 minutes before you start mixing; this matters more than you'd think.
- Large eggs, room temperature: They incorporate smoothly into the batter and won't cause the mixture to break or become grainy when you're adding them one at a time.
- Pure vanilla extract: Real vanilla makes a noticeable difference compared to imitation, and since this cake is built on vanilla flavor, don't skip that step.
- Whole milk, room temperature: It alternates with flour in the wet-dry method, keeping the batter light and the crumb tender without being fragile.
- Unsalted butter for frosting: You'll need plenty of it, and again, room temperature is non-negotiable for that spreadable, creamy texture.
- Powdered sugar, sifted: Sifting removes lumps and aerates it slightly, which prevents grainy frosting that looks dull instead of silky.
- Heavy cream or milk for frosting: Add this tablespoon by tablespoon; you might not need all of it, and too much makes frosting loose and prone to sliding off the cake.
- Gel food coloring: If you want to match school colors, use gel not liquid; liquid weakens the frosting consistency.
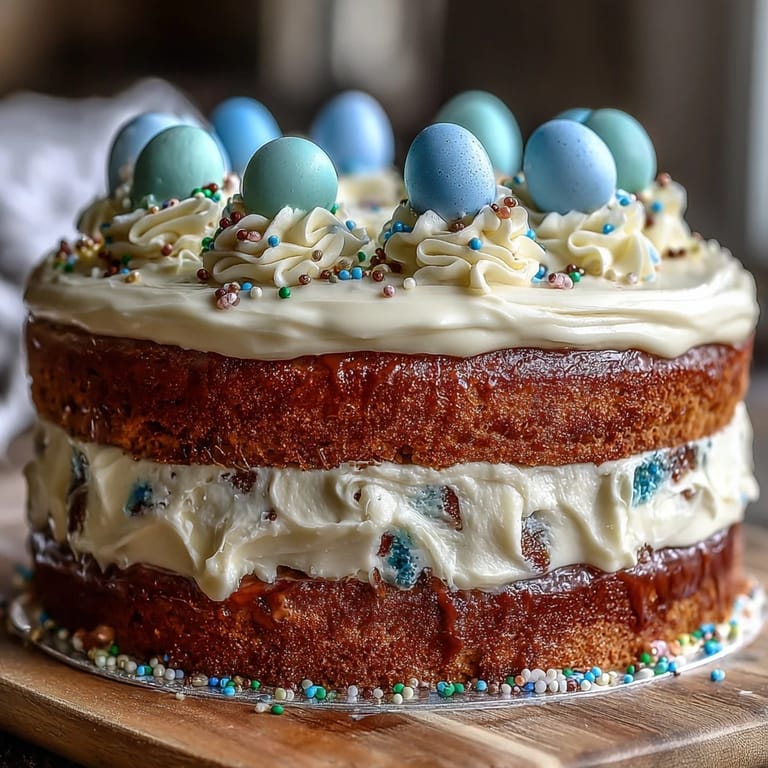
- Balloon toppers and edible confetti: These are the final touches that transform a nice cake into a celebration—they matter to the person eating it.
Tired of Takeout? 🥡
Get 10 meals you can make faster than delivery arrives. Seriously.
One email. No spam. Unsubscribe anytime.
Instructions
- Prepare your pans and preheat:
- Set your oven to 350°F and get both the 8-inch and 6-inch pans greased and lined with parchment paper so the cakes slide out without sticking. Parchment paper is worth the small expense because it means you're not wrestling with a stuck cake.
- Mix your dry ingredients:
- Whisk flour, baking powder, and salt together in a medium bowl and set aside; this ensures the leavening is evenly distributed throughout the batter.
- Cream butter and sugar:
- Beat them together in a large bowl for 3 to 5 minutes until the mixture looks pale, fluffy, and almost like wet sand; this step is building the air pockets that make the cake tender.
- Incorporate eggs and vanilla:
- Add eggs one at a time, beating well after each one so they fully combine; then mix in the vanilla extract until the batter smells like a vanilla dream. Rushing this step means the eggs don't bind properly.
- Alternate wet and dry ingredients:
- With the mixer on low, add one-third of the flour mixture, then half the milk, then another third of flour, then the rest of the milk, and finally the last third of flour, beating just until combined after each addition. This method keeps the batter from becoming tough.
- Divide batter and bake:
- Distribute the batter evenly between the 8-inch and 6-inch pans, tap them gently to release air bubbles, and slide them into the oven. The 8-inch cakes will need 35 to 40 minutes and the 6-inch cakes 25 to 30 minutes; they're done when a toothpick comes out clean.
- Cool cakes properly:
- Let them sit in the pans for 10 minutes—this lets them firm up enough to turn out without breaking—then transfer them to wire racks to cool completely. Frosting warm cake is a path to frustration.
- Make the buttercream:
- Beat softened butter until creamy, gradually add sifted powdered sugar while beating, then mix in vanilla, salt, and milk or cream one tablespoon at a time until you have something smooth and spreadable. The milk should be added slowly because frosting consistency is easier to fix by adding more than by starting over.
- Level and layer the cakes:
- Place one 8-inch layer on your cake board, spread a layer of buttercream, top with the second 8-inch cake, and repeat the process with the two 6-inch layers. Leveling the tops with a serrated knife or cake leveler first prevents tilted tiers.
- Apply the crumb coat:
- Spread a thin layer of buttercream over both finished cakes and chill them for 20 minutes; this seals in crumbs so your final frosting looks pristine. The crumb coat is a baker's secret that separates homemade cakes from ones that look amateur.
- Frost and stack:
- Apply your final layer of frosting smoothly to both cakes, center the 6-inch tier on top of the 8-inch one, and add dowels or straws beneath the bottom tier for support if you're worried about weight. The support structure is what lets you stack confidently.
- Decorate with balloons and confetti:
- Place your balloon toppers into the cake and scatter edible confetti around the base or between the tiers, then step back and admire what you've created.
 Save
Save When I placed those balloon toppers on the finished cake, my sister walked into the kitchen and actually gasped. It wasn't the most complicated thing I'd ever baked, but seeing her face light up reminded me that celebration cakes aren't about technical perfection—they're about showing up for someone's big moment with something you made with your own hands.
Why Room Temperature Matters More Than You Think
Cold butter and eggs straight from the fridge won't mix smoothly into your batter, and the result is a separation that looks concerning and bakes unevenly. I learned this the hard way when I once tried to speed up the process and ended up with an unexpectedly dense cake. Now I set everything out 30 minutes before I start, and the difference is noticeable every single time—the batter comes together faster and the crumb is reliably tender.
The Two-Tier Structure That Actually Works
Making two separate sized cakes instead of baking one large cake and cutting it means each tier bakes perfectly for its size, and you avoid the problem of overbaking the outside while the center is still raw. The smaller 6-inch cake needs less time in the oven, and giving them their own pans respects that difference. I've watched people try to tier-bake in one large pan and divide it after, and the structural integrity always suffers.
Frosting, Chilling, and the Art of Not Rushing
The crumb coat step feels unnecessary until you skip it and end up frosting over loose cake crumbs that make your final layer look speckled instead of smooth. Chilling for just 20 minutes firms everything up and makes the final frosting application feel almost meditative—your spatula glides instead of dragging. This recipe asks for patience in three key moments: letting cakes cool, applying the crumb coat and chilling, and then final frosting, and honoring those moments is what separates a beautiful cake from one that looks hastily thrown together.
- Gel food coloring tints frosting without making it watery or diluting the texture the way liquid coloring does.
- If your frosting seems too soft after you've added milk, pop the whole bowl in the fridge for 10 minutes and beat it again.
- Dowels or straws support the bottom tier without being visible, preventing that moment when the top cake starts to sink into the frosting below.
 Save
Save A graduation cake is more than dessert; it's a moment of pride baked into buttercream and decorated with playfulness. Make it, and let someone celebrate knowing you cared enough to create it.
Recipe Questions & Answers
- → What ingredients create the vanilla sponge layers?
Flour, baking powder, salt, sugar, butter, eggs, vanilla extract, and whole milk combine to create moist vanilla sponge layers.
- → How is the buttercream frosting prepared?
Butter is beaten until creamy, then powdered sugar is gradually added. Vanilla, salt, and milk or cream are mixed in until smooth and spreadable.
- → What is the best way to stack the two tiers securely?
Apply a thin crumb coat, chill the cakes, then frost smoothly. Use dowels or straws between tiers for support before stacking.
- → Can the balloon toppers be customized?
Yes, you can use store-bought balloon toppers or create your own with mini balloons and cake-safe sticks to match celebration colors.
- → How long does it take to prepare and assemble the cake?
Preparation takes about 45 minutes, cooking around 50 minutes, plus cooling and assembly totaling roughly 2 hours.