 Save
Save My grandmother never measured anything when she made beans, and it drove me crazy trying to learn her method. She'd dump what looked like half a bag of dried pintos into her favorite chipped enamel pot, add water until it looked right, and somehow produce the most creamy, perfectly seasoned beans I've ever tasted. It took me years of over-salting and under-cooking to understand that bean cookings really about patience and paying attention to the pot, not following rigid rules. Now these pinto beans are my go-to comfort food, the kind of simple dish that makes a house feel like home.
Last winter when my brother came to visit after months away, I made a huge pot of these beans. We stood around the stove together, just talking and occasionally checking the simmer, and he mentioned how much he missed having a real home-cooked meal. Something about that simple pot of beans, bubbling away with onions and bay leaves, turned a regular Tuesday dinner into a memory that stuck with both of us long after he left.
Ingredients
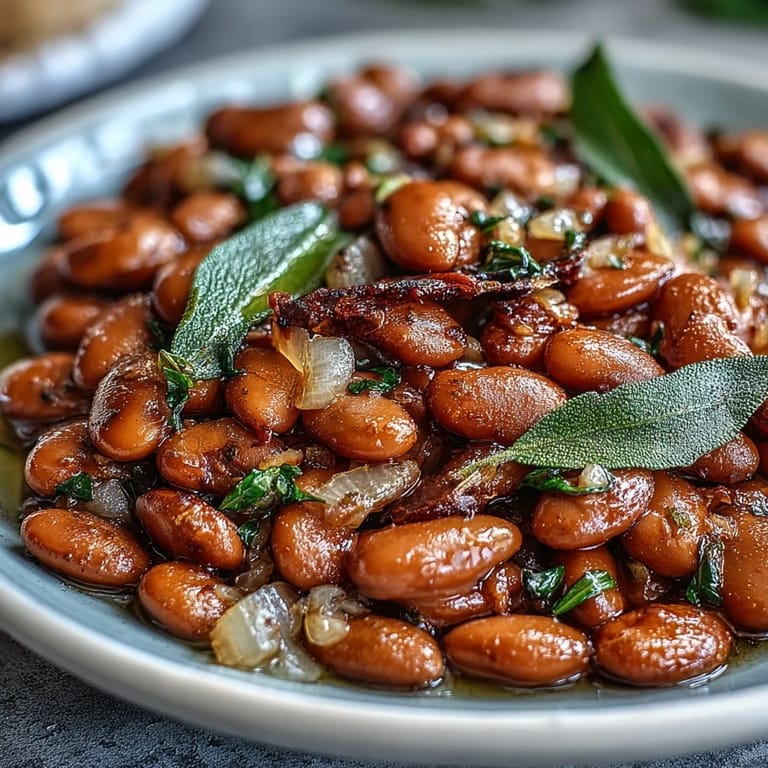
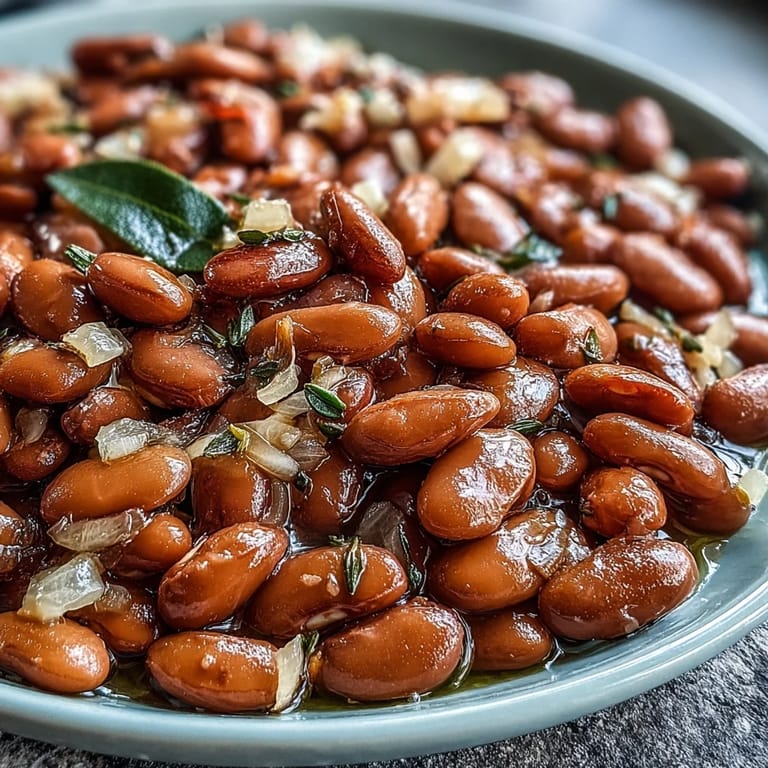
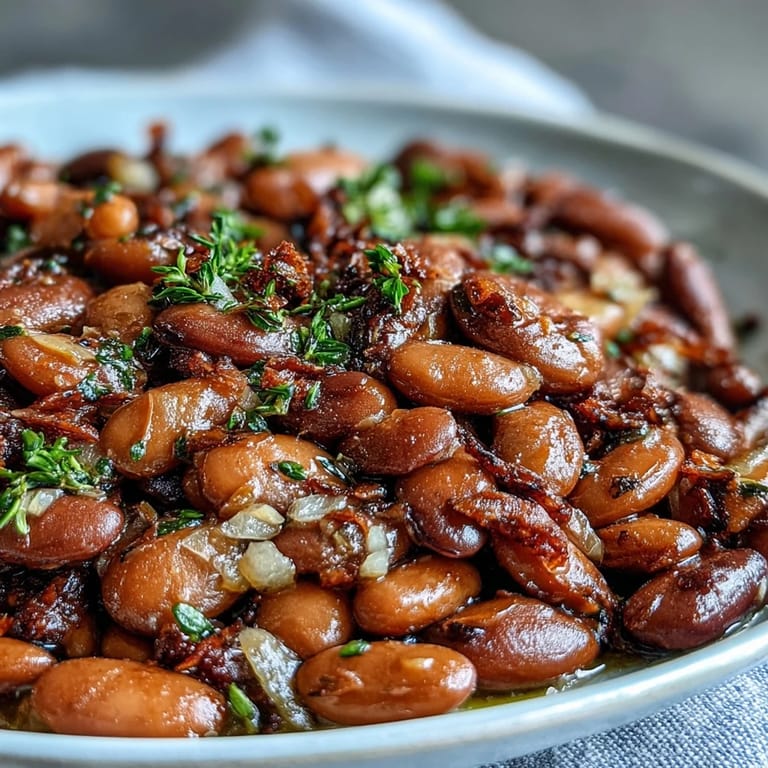
- 1 pound dried pinto beans: Rinse them well and pick through for any small stones or debris before soaking
- ½ medium yellow onion: Finely diced so it almost melts into the beans as they cook
- 2 teaspoons garlic: About two cloves, minced fresh adds the best flavor
- 2 bay leaves: Remove them before serving but let them work their magic during cooking
- ⅓ cup extra-virgin olive oil: This fat helps create that luxurious creamy texture
- 4 cups cold water: Keep extra nearby to add if the beans start to look dry
- 1 tablespoon kosher salt: Add this only in the last 10 minutes to keep beans tender
Tired of Takeout? 🥡
Get 10 meals you can make faster than delivery arrives. Seriously.
One email. No spam. Unsubscribe anytime.
Instructions
- Soak the beans overnight:
- Place the rinsed beans in a large bowl and cover with cold water by 2 to 3 inches. Let them soak at room temperature for 8 to 24 hours until plump.
- Start the cooking base:
- Drain and rinse the soaked beans well, then transfer them to a Dutch oven or heavy pot. Add the fresh water, onion, garlic, bay leaves, and olive oil.
- Bring to a gentle boil:
- Set the pot over medium-high heat and wait for bubbles to form. Skim off any foam that rises to the top with a large spoon.
- Simmer slowly:
- Reduce heat to medium-low and let the beans cook uncovered for 1½ to 2 hours. Stir occasionally and add more water if the beans are no longer submerged.
- Season at the end:
- Stir in the salt during the last 10 minutes of cooking. Taste and add more if needed before removing from heat.
- Finish and serve:
- Remove the bay leaves and serve warm, or let cool to room temperature. These beans work beautifully as a side, filling for tacos, or base for chili.
 Save
Save These beans became my secret weapon during tight budget months in college. I'd make a massive batch on Sunday and find creative ways to use them all week in burritos, with rice, or just eaten warm with a little salt and tortilla chips. Something about knowing I had that pot of beans waiting in the fridge made the whole week feel more secure.
Make It Your Own
The beauty of pinto beans is how well they take on different flavors. Try adding a smoked ham hock or a few strips of bacon during simmering for depth. A dried chili pepper adds subtle heat without overwhelming the beans natural sweetness.
Storage Solutions
Cool the beans completely before storing in an airtight container. They keep well in the refrigerator for up to 5 days and freeze beautifully for up to 3 months. I always freeze them in portion-sized bags so I can pull out exactly what I need.
Serving Ideas That Work
Mash leftover beans in a skillet with some oil and cooking liquid for quick refried beans. Warm them up and serve over rice with fried eggs for a simple dinner. Spoon them into tortillas with cheese, salsa, and fresh cilantro for the easiest taco night.
- Top warm beans with crumbled queso fresco and chopped raw onion
- Stir into soups instead of canned beans for better texture
- Serve alongside grilled meats or roasted vegetables
 Save
Save Theres something deeply satisfying about a pot of beans cooked from scratch. They feed you in a way that canned beans never quite can.
Recipe Questions & Answers
- → Do I really need to soak pinto beans overnight?
Yes, overnight soaking ensures even cooking and reduces cooking time significantly. Unsoaked beans take much longer to cook and may have uneven texture. The 8-24 hour soak hydrates the beans thoroughly for creamy results.
- → Why add salt at the end instead of the beginning?
Adding salt during the final 10 minutes prevents the bean skins from becoming tough. Early salting can inhibit water absorption and result in firmer, less creamy beans. This timing ensures proper seasoning while maintaining ideal texture.
- → Can I make these pinto beans in a slow cooker or Instant Pot?
Absolutely. For a slow cooker, combine all ingredients and cook on low for 6-8 hours. In an Instant Pot, cook on high pressure for 25-30 minutes with natural release. Both methods produce excellent results with less active cooking time.
- → What's the purpose of olive oil in the cooking liquid?
The olive oil adds richness and helps create a silky, creamy texture as the beans cook. It also prevents excessive foaming during simmering and contributes to the luxurious mouthfeel of the finished dish.
- → How long do cooked pinto beans keep in the refrigerator?
Cooked pinto beans stay fresh in the refrigerator for up to 5 days when stored in an airtight container. They also freeze exceptionally well for up to 3 months—portion them with some cooking liquid for easy thawing and reheating.
- → Can I skip the soaking if I'm short on time?
You can use the quick-soak method: cover beans with water, bring to a boil for 2 minutes, then remove from heat and let stand for 1 hour. Drain and proceed with cooking. The texture may be slightly less creamy than overnight soaking.